Fast, Reliable Customer Service, Competitive Pricing and Quick Turnaround!
The short version: To clean a whiteboard, lightly spray the surface with water or a dry-erase cleaner, wipe with a microfiber cloth using broad overlapping strokes, then finish with a clean water wipe to remove any residue. For stubborn stains, ghosting, or old marker, use 90 to 99% isopropyl alcohol on a microfiber cloth. Never use paper towels or abrasive pads; they scratch the surface and cause permanent staining.
Whether you’re wiping down a board after a busy meeting or tackling stains that have been sitting there for weeks, knowing how to clean a whiteboard the right way makes a real difference. A properly cleaned dry erase board is easier to write on, easier to read, and — with the right routine — it’ll stay looking sharp for years.
At EVERWhite, we’ve been manufacturing whiteboards in Warminster, PA since 1992. We’ve seen what good cleaning habits do for a board’s longevity, and we’ve seen what the wrong products can do to one. Everything we know, we’re sharing here.
Before you start, gather your supplies. You genuinely don’t need much:
A quick word on microfiber: regular paper towels and cotton cloths leave lint behind and can scratch softer whiteboard surfaces over time. Microfiber is soft, non-abrasive, and far more effective at lifting dry erase ink without smearing it. If you take one thing away from this guide, it’s to use a microfiber cloth.
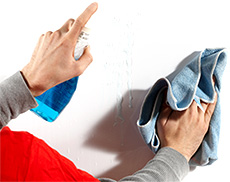
For everyday cleaning after normal use, this simple routine is all you need.
That’s the routine. Keep it consistent and you’ll rarely have to deal with anything more complicated.
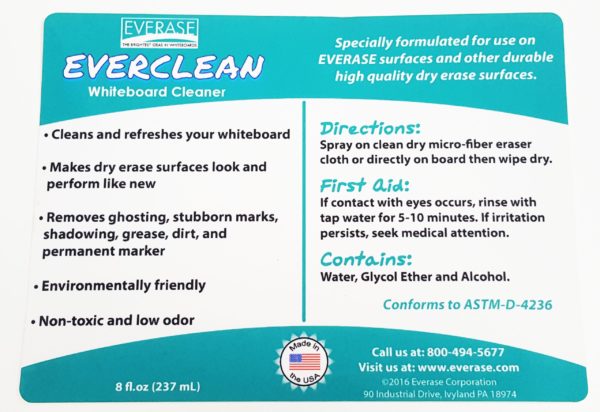
Not all cleaners are created equal — and some can cause real damage to a dry erase board surface. Here’s what works, and when to use it.
What to avoid entirely: abrasive cleaners, scouring pads, bleach, ammonia (in high concentrations), toothpaste, baking soda, or anything with gritty particles. These will scratch the surface coating — and once scratched, the board becomes porous. Dry erase ink then penetrates the surface rather than sitting on top of it, and no amount of cleaning will fully remove it.
If your whiteboard won’t erase cleanly — or you’re left with a visible residue after wiping — you’re dealing with either built-up ink residue or early-stage ghosting. Here’s how to address each.
For ink residue buildup, plain water won’t get the job done. Start with 90–99% isopropyl alcohol on a microfiber cloth and apply firm pressure in circular motions over the affected areas. For buildup across the whole board, spray the entire surface liberally with whiteboard cleaner or isopropyl alcohol, let it sit for 30 seconds, then wipe with a fresh microfiber cloth. You may need to repeat this twice.
For dry erase boards that have been neglected for a long time, the surface may have a heavy layer of dried ink and residue. In this case, apply isopropyl alcohol generously, let it dwell for 1–2 minutes, then wipe. Follow with a second pass using a dedicated whiteboard cleaner, and finish with a clean water wipe.
If staining still won’t budge after multiple attempts, the surface itself may be permanently compromised — we cover your options at the end of this guide.
Whiteboard ghosting is the faint shadow of previous writing that stays on the board even after it’s been erased and cleaned. It’s one of the most common whiteboard problems — and one of the most preventable.
Ghosting typically happens because:
To remove whiteboard ghosting, 90–99% isopropyl alcohol is your most effective option. Apply it to a microfiber cloth and work in small, firm circular motions over the ghosted areas. Be patient — stubborn ghosting may take several passes. A dedicated whiteboard cleaner can also lift lighter ghosting; apply generously, leave for a minute, then wipe.
To prevent ghosting going forward:
If ghosting keeps returning despite your best efforts, it’s a reliable sign that the surface coating has degraded. At that point, cleaning alone won’t fix it — resurfacing or replacing the board is the more practical long-term call.
It happens to everyone at some point — a Sharpie® or other permanent marker ends up on the dry erase board. The good news is that it’s often fixable.
The go-to method: trace directly over the permanent marker ink with a dry erase marker. Let the dry erase ink sit for a few seconds, then wipe the board with a clean microfiber cloth. The solvents in the dry erase ink help loosen and lift the permanent marker as it’s wiped away.
For marks that are still visible after the dry erase method, follow up with 90–99% isopropyl alcohol or a glass cleaner like Windex®. Apply to a microfiber cloth and work over the stain with firm pressure.
If the stain persists after multiple attempts, it may have penetrated through the surface coating. Give EVERWhite a call at 800-335-7319 — we’re happy to advise based on your specific board type and surface.
Tape residue and sticker glue are tricky because most spray cleaners don’t dissolve adhesive. The right tool for this job is a purpose-made adhesive remover, like Goo Gone®.
Apply a small amount to a soft cloth and work it gently over the sticky area using slow, firm strokes rather than scrubbing. Once the adhesive is lifted, clean the area with your regular whiteboard cleaner or a damp microfiber cloth to remove any oily residue the adhesive remover may have left behind.
One thing to be very clear about: never use plastic scrapers, metal tools, or any abrasive pad to remove tape from a whiteboard. Even plastic scraping tools can gouge the surface coating, permanently affecting erasability.
Consistent, light cleaning always beats infrequent deep-cleaning sessions. Here’s a routine that keeps on top of things without much effort.
After each use: erase writing while it’s still fresh. A clean microfiber cloth takes seconds and prevents buildup from setting in.
Every 2–3 days (or more frequently for heavily used boards): wipe down the entire surface with a damp microfiber cloth or a light spray of whiteboard cleaner. This is the step most people skip — and it’s the one that prevents ghosting.
Monthly: do a thorough clean with isopropyl alcohol or a dedicated whiteboard cleaner. This removes the invisible residue that accumulates gradually over time and keeps the surface performing the way it should.
If you’ve worked through everything above — multiple alcohol treatments, dedicated cleaners, repeated passes — and your board still shows persistent ghosting, deep staining, or uneven erasure across sections of the surface, the coating itself has likely degraded beyond what any cleaner can fix.
This doesn’t necessarily mean replacing the whole board. EVERWhite makes resurfacing solutions designed for exactly this situation: a fresh, high-performance dry erase surface at a fraction of the cost of full board replacement. And if your existing board is simply worn out or the wrong size for your space, our wall-mounted boards come with a lifetime surface guarantee — meaning if you follow basic cleaning guidelines, we guarantee it won’t stain.
If your whiteboard surface is beyond saving but the frame or mounting is still solid, EVERASE resurfacing material applies directly over the existing surface — like a large, smooth-finish sticker — giving you a brand-new, high-gloss dry erase writing surface. No special tools or installation required.
For an even more robust resurfacing solution, our peel-and-stick magnetic panels install flat against any smooth surface and provide a durable, magnetic dry erase surface. Great for reviving a ghosted or stained whiteboard — and because they’re magnetic, you can use them to hold notes, documents, and accessories too.
If the surface and mounting of your current whiteboard is unusable or damaged, we recommend replacing it with a brand new dry erase whiteboard. Our wall-mounted dry erase boards come in aluminum or wood frames and a full range of standard and custom sizes. Every board ships with EVERWhite’s lifetime surface guarantee: maintained correctly, it will not stain. Available to purchase directly online.
The same guaranteed writing surface, with your custom graphics, layouts, schedules, or branding printed directly onto the board. Popular for healthcare rooms, coaching facilities, classrooms, and manufacturing floors. The surface cleans identically to a standard whiteboard.
For routine cleaning, a microfiber cloth dampened with water is genuinely all you need if you clean the board regularly. For tougher stains and built-up residue, 90–99% isopropyl alcohol or a dedicated whiteboard cleaner works best. Always use a microfiber cloth — not paper towels or abrasive cloths, which can scratch the surface.
Yes. Glass cleaners like Windex® are safe and effective on most whiteboard surfaces — particularly porcelain steel and high-gloss coated boards. They’re a solid alternative when you don’t have a dedicated whiteboard cleaner available.
When a dry erase board stops erasing cleanly, it’s usually due to ink residue buildup or surface ghosting. Clean the board with 90–99% isopropyl alcohol and a microfiber cloth. If the problem persists, the surface coating may have degraded — resurfacing is likely the best option at that point.
Ghosting is best removed with 90–99% isopropyl alcohol applied with a microfiber cloth using firm, circular motions. To prevent it recurring, erase writing within 24–48 hours and do a regular wet clean with a proper whiteboard cleaner rather than relying on the dry eraser alone.
Trace over the permanent marker with a dry erase marker, let it sit for a few seconds, then wipe with a microfiber cloth. Follow up with isopropyl alcohol or Windex® for any remaining residue.
Yes — 90–99% isopropyl alcohol is one of the most effective and surface-safe cleaners available for dry erase boards. Avoid lower concentrations like 70%, which are less effective on set-in ink.
Wipe the board after each use with a dry eraser or microfiber cloth. Do a proper wet clean with whiteboard cleaner every 2–3 days for normal use. A deeper clean with isopropyl alcohol once a month keeps the surface in top condition long-term.
Yes. A white vinegar and water solution (1 teaspoon vinegar per cup of water, up to a 1:1 ratio for tougher stains) is a safe, natural cleaning option. Spray on, wait a moment, then wipe with a microfiber cloth.
Tap or clap felt erasers over a trash can to knock out loose ink, and for deeper buildup, hand wash the pad in warm water with a little mild dish soap, then let it dry fully before reuse. A saturated eraser smears ink back onto the board, so a clean eraser is often the fix for a board that will not wipe clean. Replace clip-on eraser pads once they stay grey after washing.
Plain water on a microfiber cloth handles a board that is cleaned regularly. For tougher marks, 90 to 99% isopropyl alcohol, a glass cleaner like Windex, or a light white vinegar and water solution all work well. Avoid paper towels, abrasive pads, and anything gritty, they scratch the surface and lead to permanent staining.
SHOP NOW! See our selection of aluminum-framed and wood-framed wall-mounted boards and mobile whiteboards with a dry erase surface that is super easy to clean and that is guaranteed not to stain or ghost! All of our products are available for sale online.